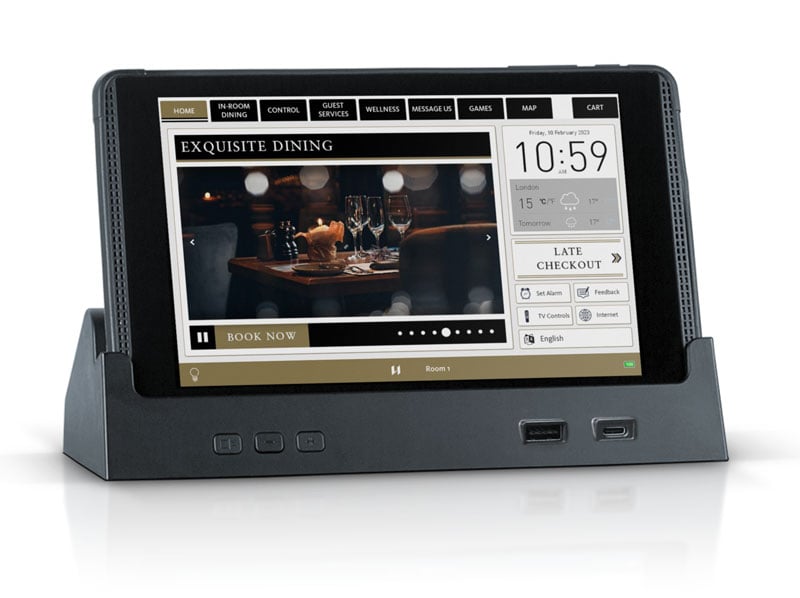
The following guide will advise on the steps to setup and deploy Crave In-room tablets using the Crave configuration launcher, which is preinstalled on all Crave In-Room tablets.
The Crave configuration launcher will guide you through the steps required to install the latest Crave applications and prepare your In-Room tablets prior to installing into guest rooms.
Starting the Crave configuration launcher
The Crave configuration launcher will allow you to carry out the following simple steps to ensure your In-room tablets are ready to be installed into guest rooms.
• Install the latest Crave application versions • Connect your In-Room tablets to Wifi • Configure the Crave application specifically for your property • Assign the correct room number
Step 1
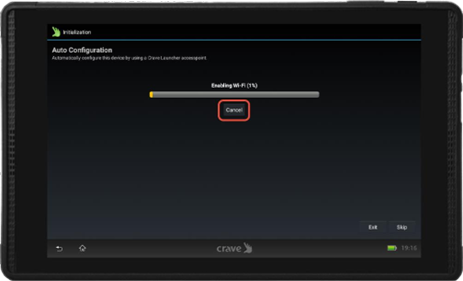
The Crave configuration launcher will start as soon as you switch on your In-Room tablet. Use the power button located on the top right to switch on your device.
Alternatively the Crave configuration launcher will start automatically after the reboot required during a factory reset.
The device will try to auto configure. Please press Cancel
Step 2
Click Skip to start manual setup
Step 3
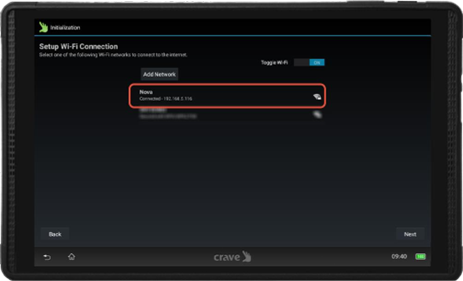
Identify your wifi connection and click to enter the password. You can also manually configure a hidden network by selecting Add Network. Click Next once connected
Step 4
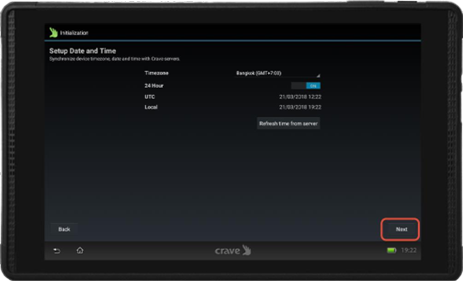
You do not need to set the time zone as the Crave cloud will display the correct time zone automatically. Click Next to continue.
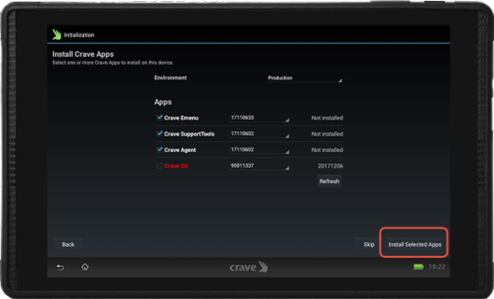
Step 5
On the Install Crave Apps screen you will only need to install the first 3 applications unless instructed otherwise by your project manager or Crave support personal.
Please tick the boxes next to the first 3 applications. The most up to date application version numbers will be selected by default.
Select Install Selected Apps.
The Configuration launcher will now download and install the latest versions from the Crave cloud
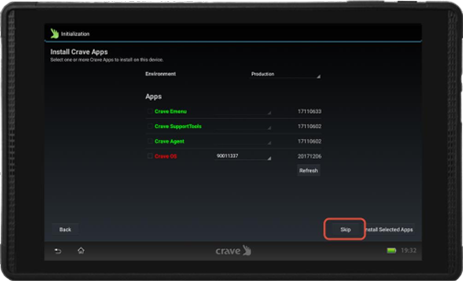
Step 6
Green indicates that the Crave application have been successfully installed. Click Skip to continue
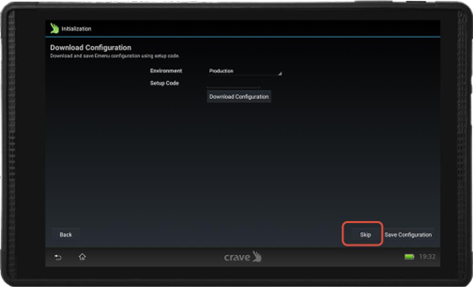
Step 7
Click Skip on the Download Configuration page. This step is not required
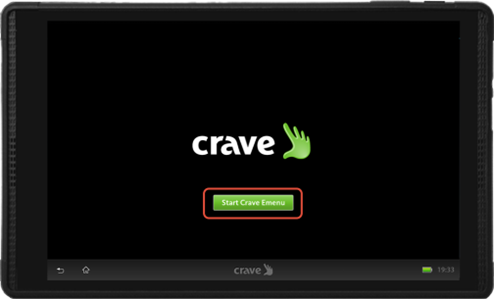
Step 8
Installation has now been completed. You can select Start Crave Emenu to launch the application
Configuring the emenu application
Once the application launches you will be asked to complete the configuration for your property.
Step 1
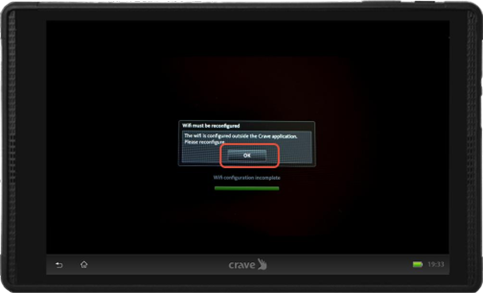
First you will be prompted to setup Wifi within the Crave application. Click ok
Step 2
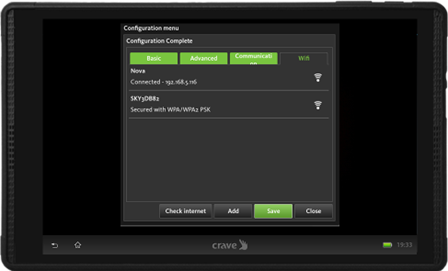
Select the Wifi network you would like to connect to and enter the password. You can also select add if you wish to configure a hidden network
Step 3
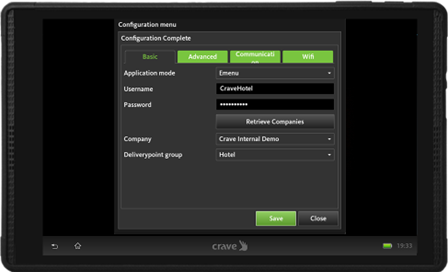
Click on the basic tab and enter the Username and Password supplied by your project manager or Crave support personal. Select Retrieve companies. Ensure the correct deliverypoint group is selected. The Delivery point group will be supplied by your project manager or Crave support personal. Click Save. The application will now prompt you to be restarted
Step 4
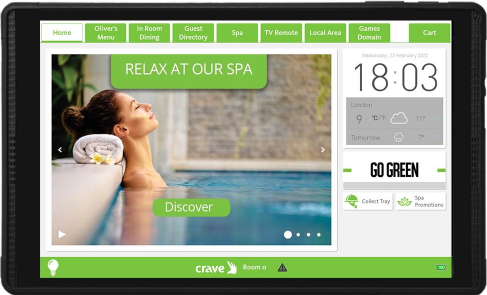
Once the application has launched and the homescreen is visible you have successfully installed the Crave Emenu application. Before installing the In-Room tablet into guest rooms you will need to configure the correct room number.
Assigning a room number
Each In-room tablet must be assigned a room number in order to be able to place orders and service requests. The room number allows hotel personnel to identify which guest is using the tablet as well as allowing them the option to directly message each In-room tablet. The following steps will guide you through assigning a room number for the first time or changing the room number if you need to move the In-Room tablet to another room.
Step 1
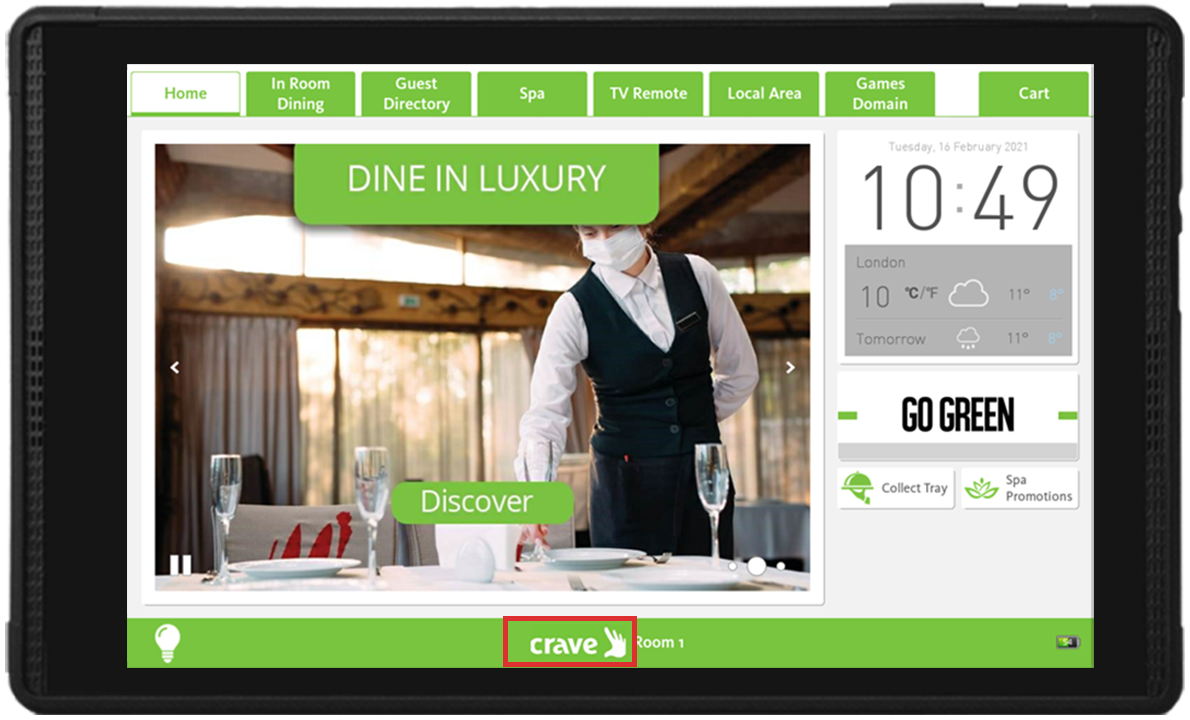
Select the Crave logo or your company logo displayed on the footer bar to open the staff login.
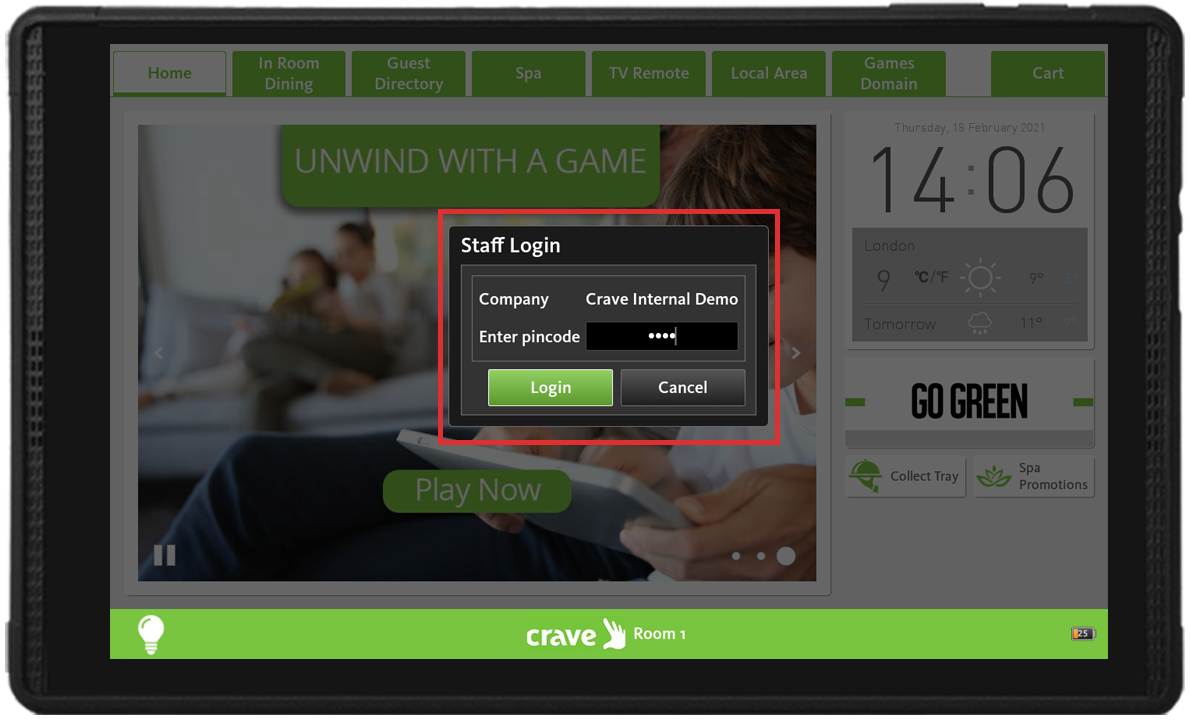
Step 2
Enter your pin code, then select the login button to access the management menu.
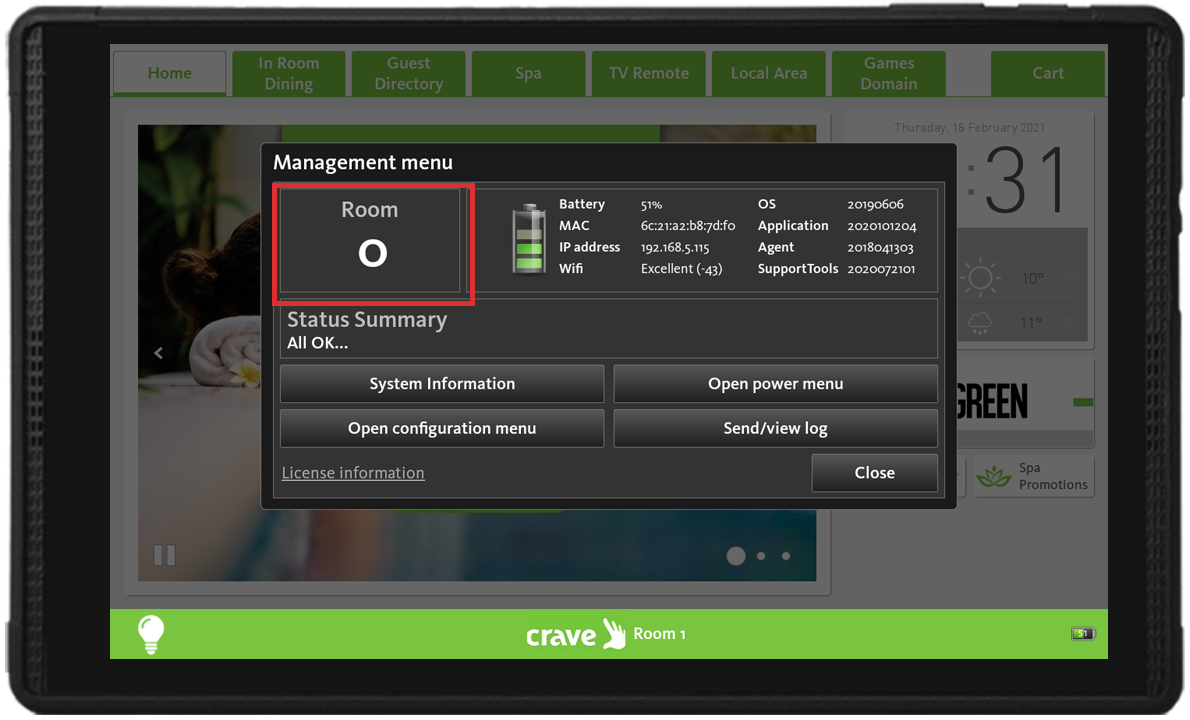
Step 3
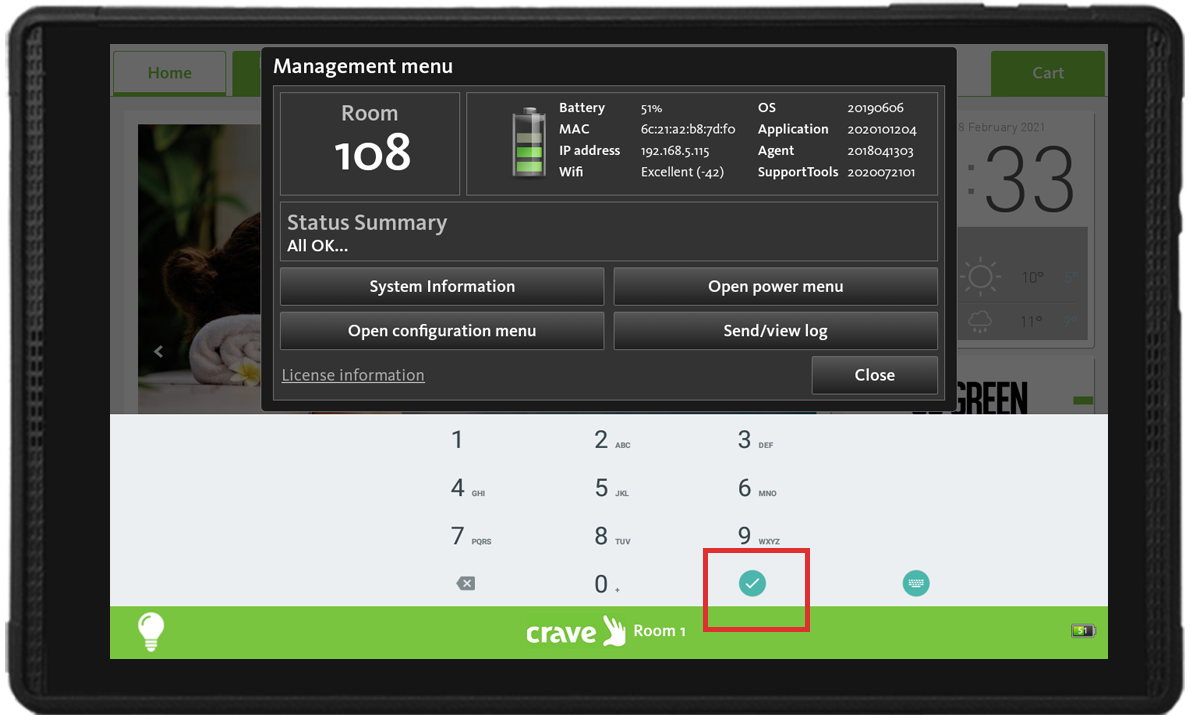
Click on the Room Number field which will open the keypad.
Step 4
Enter the required room number on the keypad and select the highlighted green tick to confirm.
Please take care to ensure the the correct room number is programmed. An ncorrect or duplicate room number can result in orders or service requests to be delivered to the wrong guest.
Step 5
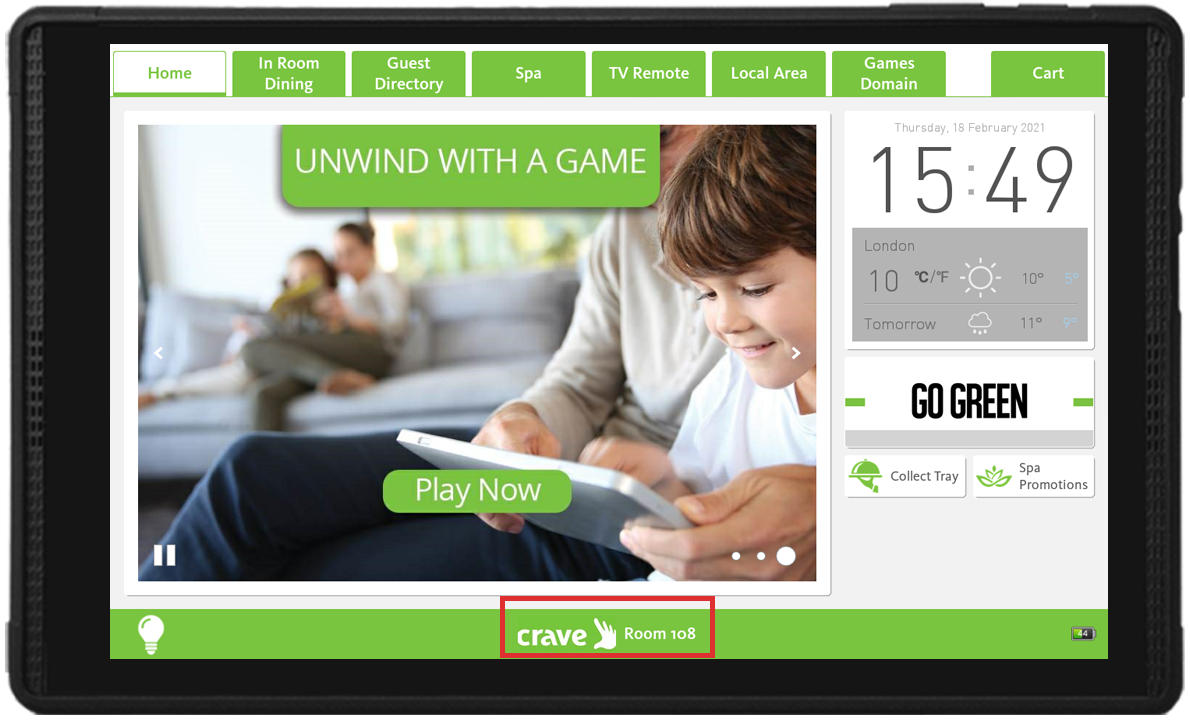
Select close to return to the application. The newly assigned room number will appear on the footer bar.
Need assistance?
Our team is always on hand to help you with any content requirements, so feel free to reach out to us and we could be delighted to assist.
You can email us by submitting the form and we'll be in touch to discuss your requirements.
Alternatively, you can reach out to us using Crave Video Services using the button below.