<img src="https://secure.7-companycompany.com/796468.png" style="display:none;">

Crave messaging

What is messaging?


Messaging is a feature in Crave's platform that allows you to send pop-up messages to the devices that you have on property.

These can be used for information sharing, promotions, upselling and more.

The pop-up messages can be sent to all devices or just a selection of devices.

They can also be sent ad-hoc or scheduled ahead of time.

tablet family

Types of message


Scheduled messages


Scheduled messages are set up in the Crave CMS via our 'marketing schedule' and can be pre-set to appear any time, and can be set to reoccur on a daily, weekly, or even yearly basis.

The benefits of this type of message is that it allows you to get ahead of the curve and save time by preplanning your messages.

It allows you to promote daily occurrences with ease such as upselling breakfast in bed, or lets you set up messages for your upcoming events well ahead of time.

Ad-hoc messages


Ad-hoc messages are set up either in the Crave CMS or manually configured on the staff console and are there to be sent out to devices as and when they are required.

The benefits of ad-hoc messages are that you are able to set up last-minute messages with ease, and personalise existing templates on the go.

You can send out a last-minute maintenance announcement, or tailor a spa booking to maximize revenue a specific set of guests.

DSC04928

Message layouts


There are four different types of message as listed below:

Full Page Image

Image size - 928 x 422 

Full Page GIF

Image size - 928 x 422 

Medium Image or GIF with Text

Image Size - Medium and Large - 320 x 422

Text - Maximum of 150 characters.

Large Image of GIF with Text

Image Size - Medium and Large - 320 x 422

Text - Between 150 and 500 characters 

Example messages

ezgif.com-optimize (5)

Spa treatments


A great call to action is persuasive, creates a sense of urgency, and is action oriented.
Happiness-Gif

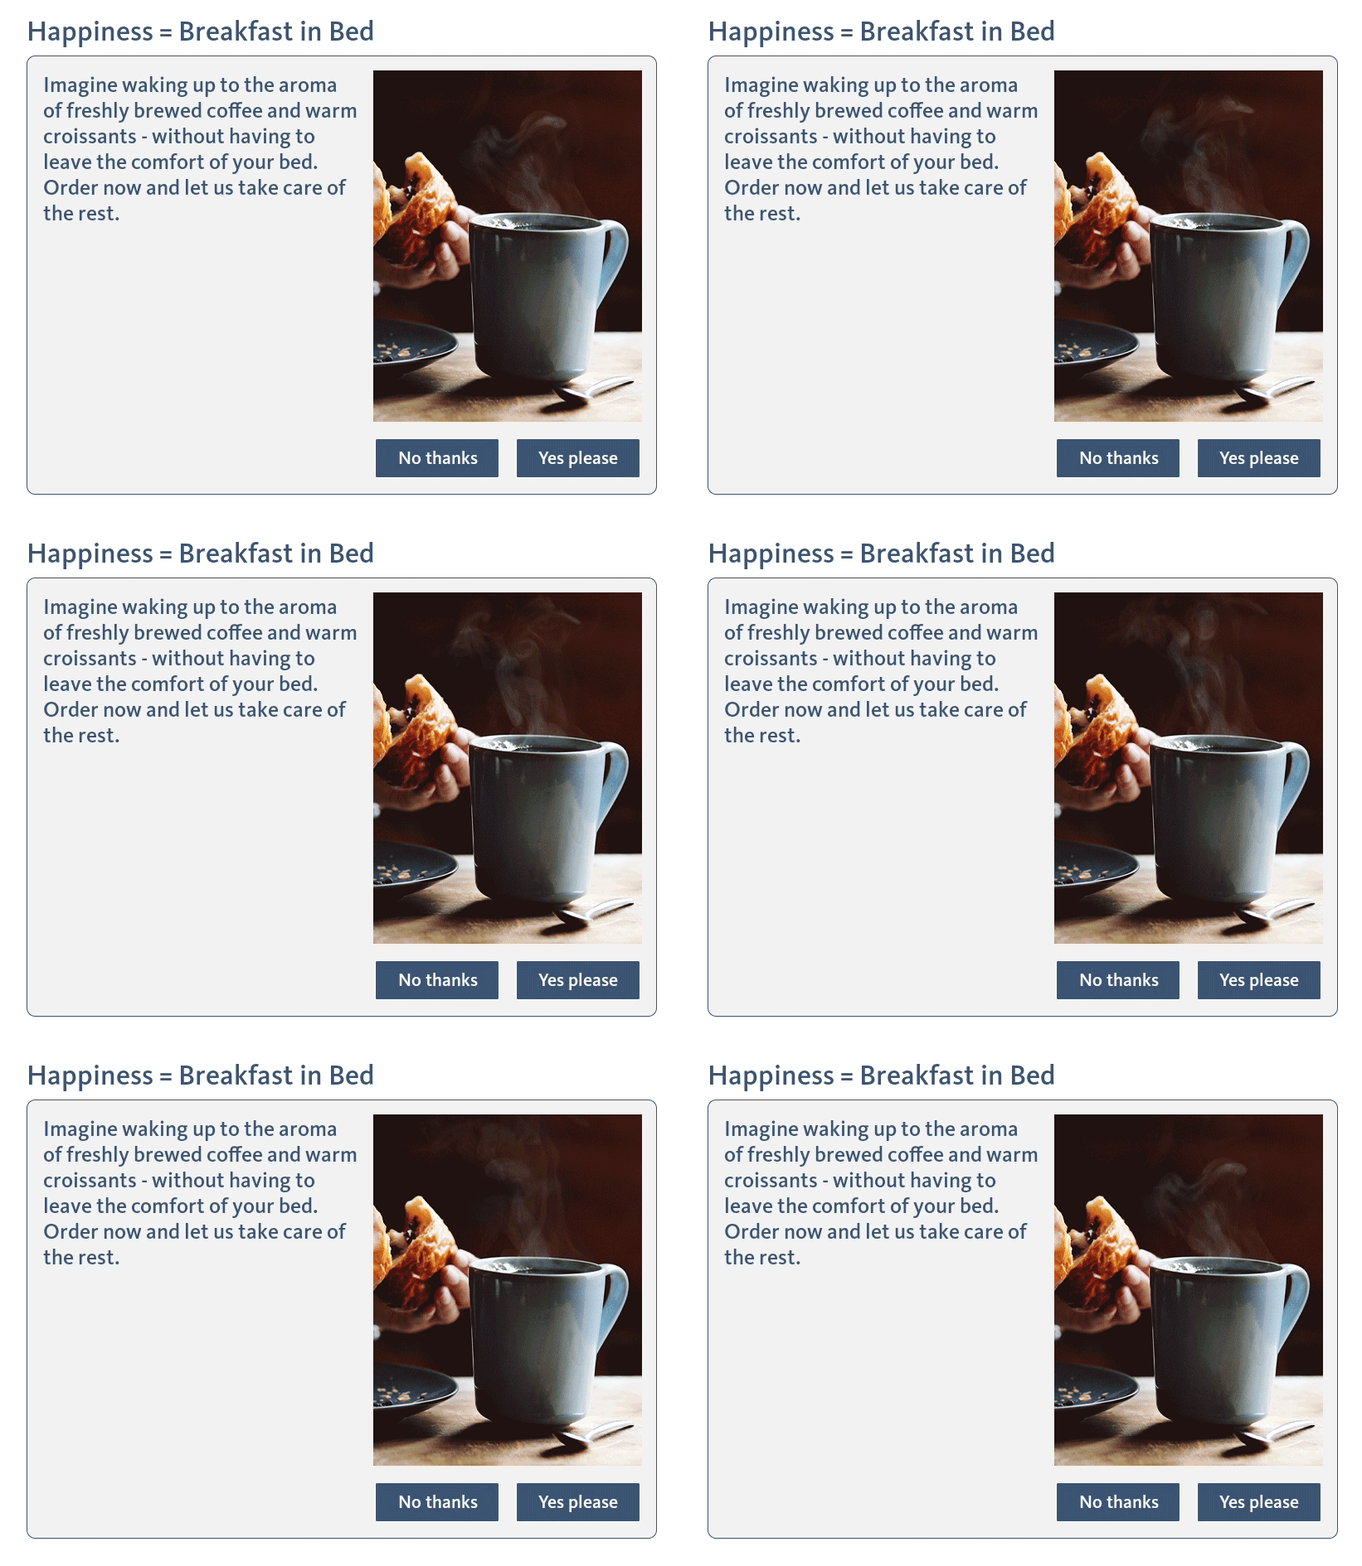
Breakfast in bed


Timing is everything, so you can schedule messages to appear at the right time of day to entice your guests.
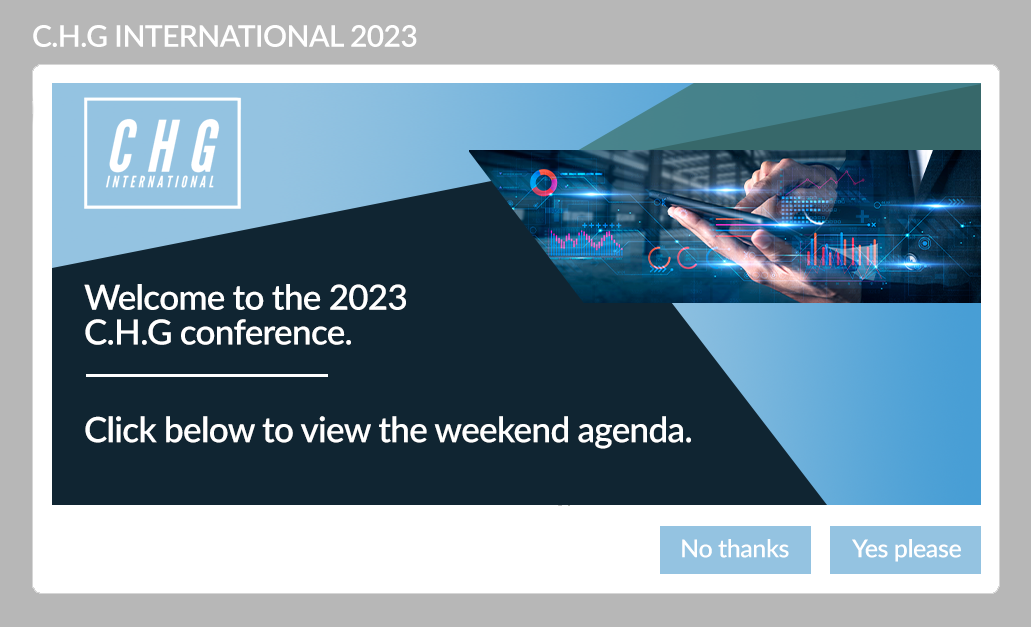
CHG INTERNAIONAL

True innovation


Make the most out of your hosted events by selling ad space for promotional materials.

ezgif.com-optimize (1)

Excursions and adventures


Make the most of your fast-paced attractions with dymanic imagery and videos.
ezgif.com-optimize (3)

Make it personal


A great way to make a guest feel special is to use tailored messaging just for them.
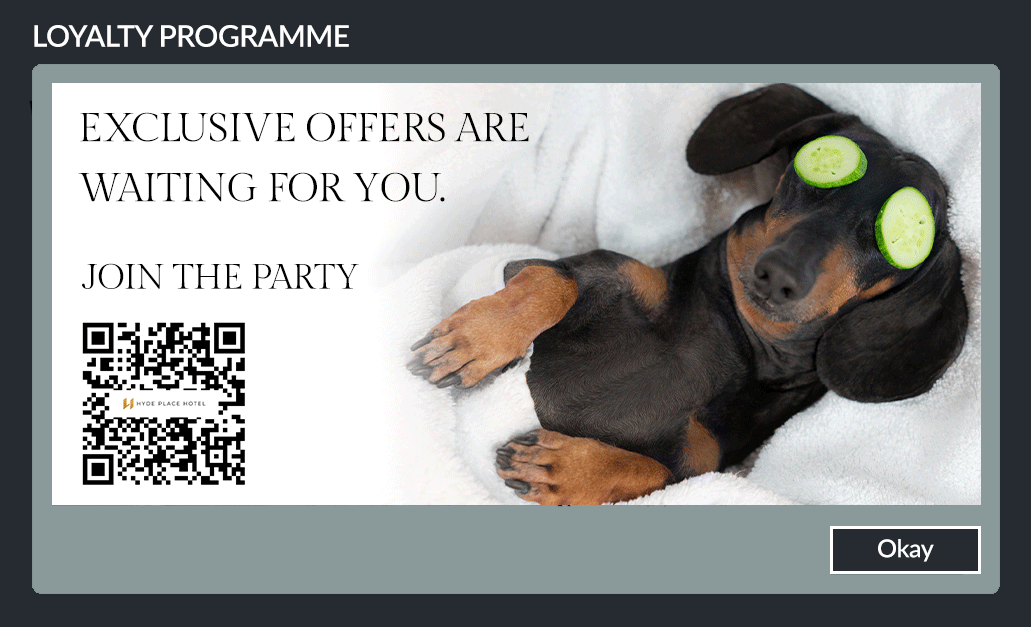
Loyalty

Reward loyalty


Promote your loyalty schemes, and even add QR codes so guests can take the information with them

ezgif.com-optimize (6)

Special experiences


Tailor your messages to your events and happenings, to get the footfall in the places you need it most.
ezgif.com-optimize (2)

Important notices


Handle the urgency with ease, by sending out important messages with just the click of a button.

ezgif.com-optimize (4)

Upselling comfort


Making it easy for the guest to stay longer, increasing their average spend per stay.

Scheduled messages

Message templates allow staff to send pre-configured messages to guest-facing tablets from the Crave CMS.

Messages can be configured with a title, a body of text, an image, and can be linked to other areas of content on a tablet.

Alternatively, it is possible to configure messages to consist of a single animated design.

These can be created at any time of day, or even weeks in advance, to ensure you have a full suite for all of your needs.


dine-at-the-chefs

Creating a standard scheduled message


1

Step 1

Login to the Crave CMS and navigate to Messages > Scheduled Messages.

To create a new scheduled message, select Add.

Screenshot 2024-11-22 085655

Step 2

Enter the Friendly Name so you can locate the message in the system easier and set the message type to Standard.
Screenshot 2024-11-22 085537

Step 3

Scheduled messages can be configured with a Title, a Friendly Name, a Message and media from the gallery. Users can also select the size of the message using the Message Layout Type Full-screen GIF messages need to be configured to Auto Size.
image_2024-11-22_085821505

Step 4

Alternatively, pre-existing message templates can be imported from the Message Template If this option is chosen, all fields will inherit their values from the message template.
Scheduled 2

Step 5

To link the message to products, categories or URLs, navigate to the Action section and choose your desired action.
S6

Step 6

Once your message is configured, select Save.

Creating full screen scheduled messages


Step 1-2

Step 1

Login to the Crave CMS and navigate to Messages > Scheduled Messages.
Step 2-1

Step 2

To create a new scheduled message, select Add.

Step 3-1

Step 3

Enter the Friendly Name so you can locate the message in the system easier and set the message type to Full Screen.
Step 4-1

Step 4

Scheduled messages can be configured with a Title, a Friendly Name, a Message and media from the gallery.
Step 5-1

Step 5

To link the message to products, categories or URLs, navigate to the Action section and choose your desired action.
Step 6-1

Step 6

Once your message is configured, press Save.

Creating a message group


M1

Step 1

Login to the Crave CMS and navigate to Messages > Messagegroups.
MC2-1

Step 2

To create a new messagegroup, select Add.
Group 1

Step 3

Give your messagegroup a name which gives some indication of its contents. For example, if your messagegroup is for deluxe suites, call it deluxe suites. Ensure Custom is selected in the Type. Select Save.
m5

Step 4

In the Deliverypointgroup field, select the deliverypointgroup you want to select rooms from.
m6

Step 5

In the Deliverypoint numbers fields enter the range of rooms to add to the messagegroup. Enter the lowest number in the first field and the highest number in the second.
m7

Step 6

Select Add range and every number in your range will then be added to the messagegroup.
m8

Step 7

Navigate to Publish > Publish Content.
m9

Step 8

Tick the section titled Messagegroups and select Publish.

Adding message to schedule


MS1

Step 1

Login to the Crave CMS and navigate to Company > Marketing Schedules.
MS2

Step 2

Select the marketing schedule that applies to the group of rooms that you would like to send the message to. It is possible that there is only one marketing schedule for all rooms.
MS3

Step 3

Select Add Item.
MS4

Step 4

In the Message field, locate the message you created. In the Send To field, select the messagegroup you created.

MS5

Step 5

In the Start Time field, dictate the date and time you would like the message to appear on guest tablets. In the End Time field, define the time you would like the message to disappear.
MS6

Step 6

If you would like to arrange repeat occurrences, tick the Recurrence box.
MS7

Step 7

Messages can be scheduled to appear on a daily, weekly, monthly or yearly basis depending on your requirements. Additionally, messages can be scheduled to appear with no end date, to cease appearing after a certain number of occurrences, or to end on a certain date.
MS8

Step 8

Once the schedule is configured as you require, select OK. It is not necessary to save or to publish the changes made to a marketing schedule. Guest tablets will automatically pull through any changes made to this section.
in-tablet-full-screen-1

Step 9

Your message will pop-up at the scheduled time on the required devices.

Ad-hoc messages


Sending messages could not be easier for your staff. Using your handy Crave console, you can quickly fire out messages of your choosing to specific rooms at any time of day. 

With the option to select the recipients, the duration and customise the message completely to your liking, things could not be easier.

Creating a message template


Image 1

Step 1

In the Crave CMS, Navigate to Company > Message Templates.
Image 2

Step 2

Create a new message template by selecting Add.
Image 3

Step 3

Enter the Name, Title, and main message text (if applicable). If you are utilising a GIF with the main text incorporated in the design, it is not necessary to add this to the Message field.
Image 4

Step 4

Select the size you would like your message to appear as when sent to guest devices. If you are utilising a GIF, the size must be set to Auto Size.
Image 5

Step 5

Select the media you added to the gallery by selecting Select Image.
Message Link

Step 6

If you would like the message template to link to a product or category, simply select the correct item from the drop-down menu. It is important to note that in order for an item to be linkable, the Announcement Action tick-box must be selected in the Advanced tab of the product page itself.
Image 7

Step 7

Once your message template is configured according to your needs, select Save.
Image 8

Step 8

Navigate to Publish > Publish Content.  Tick the section titled Message Templates and select Publish.

Adding media to the gallery


G1

Step 1

In the CMS, Navigate to Company > Gallery. This is the area where you will add the media for your message.
G2

Step 2

Select Choose File and browse your device for the image or GIF you would like to use. Select Add Image.
G3-2

Step 3

Scroll down to the bottom section titled Dimensions and ensure that Gallery, GallerySmall and GalleryLarge are ticked. If you have uploaded a GIF, also ensure GalleryFullScreen is selected.
G4

Step 4

For each dimension you tick, a new tab will be generated at the top of your page where you can select the area of focus.

Sending a message from the console


1 (2)

Step 1

Access one of the staff consoles that you have loaded on-site, and then, navigate to the Send Message tab.
2 (2)

Step 2

Bespoke messages can be sent by simply filling out the Title and Message fields and selecting an image from the gallery using Select Picture. You can also choose whether the message should link to a product or category by selecting the Yes/No button, and set how long the message shall appear on the tablets before disappearing using the Set Duration button.
3

Step 3

Alternatively, users can choose a message from the Select Message Template field, which will pre-populate all fields according to their configuration in the CMS.
4 (1)

Step 4

Once the fields have been configured, use the Select Rooms button to dictate where the message will be sent. Messages can be sent to any single room, or group of rooms, required using the fields available.
5 (1)

Step 5

If the message is highly important, users can elect to tick the Urgent tick box. This will highlight the message in red on the guest tablets and it cannot be removed by guests. The only way to remove urgent messages is by pressing the Clear previous sent messages button on the staff consoles.
6 (1)

Step 6

Select the Preview button to view the display of your message before sending it to the guest tablets. Please note that the message will adopt the colours of the guest tablets’ theme once sent.

Frequently Asked Questions.

Can I change a message image?

You certainly can. All you need to do is revise the image on either the message template or on the scheduled message within the CMS. If you are using an existing gallery image, this will take immediate effect the next time the message is sent. If you are adding a new image to the gallery, you will need to resatart the devices before this will be shown.

How do I recall a message?

If a message is sent mistakenly, you can remove this from the devices by either deleting it from the marketing schedule, or by tapping 'clear previous sent messages' on the console

What if I don't have time to change a message?

Do not worry if you do not have the capacity to make these changes yourselves. The Crave customer success team is here to help. Simply reach out to us using the form below and we would be happy to assist.

Speak to support

Speak to support

Connect with our support team to discuss any content or support requirements you may have.