Alterations come in different forms but share the same goal of gathering additional information related to a specific product or product type.
Alterations can be created and assigned to both products and categories and are essential for giving extra flexibility to guest orders and requests.
Alterations come in 4 types which have their own distinct uses and functions.
Options - Option alterations are most common and allow guests to select 1 or many choices from a list of alterationoptions.
Date - Date alterations allow guests to select a date from a range of future dates decided by you when creating the alteration
DateTime - DateTime alterations act the same as Date alterations but allow extra input by the guest as they are also able to select a time. The dates and times available are dictated by you when creating the alteration.
Form - Form alterations are handy for gathering extra personal guest information and allow open ended answers. Form alterations include text fields, email fields and numerical fields.
Alteration is the name given to the list of choices given to the guest on a particular product. When deciding to create an alteration, you will need to decide an alteration name and type first.
Alteration Options are specific to Options alterations and refer to the individual options and choices within the alteration itself. For example, an alteration allowing guests to select an egg style may include alteration options such as scrambled, fried and poached.
Alteration options can be edited using the pen and paper icon on the right hand side and prices can be assigned per alteration option if the option is chargeable.
Option alterations are the most commonly used alteration type and are usually made and tailored to specific products or assigned at a category level to apply to all products within.
The versatility of option alterations allows them to be customized to suit any situation where the guest or user is given a choice. Whether it's choices regarding an in-room dining order, choosing a spa treatment time or picking a pillow from a pillow menu, the option alteration is an important feature to utilize to enhance guest experience and smooth operations.
Additional alterations can be created underneath alteration options to create a multi-layered 'nested' alteration which allows specific alterations to appear when a previous option is chosen.
Begin your alteration journey by locating the alterations page in the CMS by navigating to Menu Management -> Alterations. To create a new alteration click Add.
This will take you to an alteration creation page where you can select the specifics of the alteration.
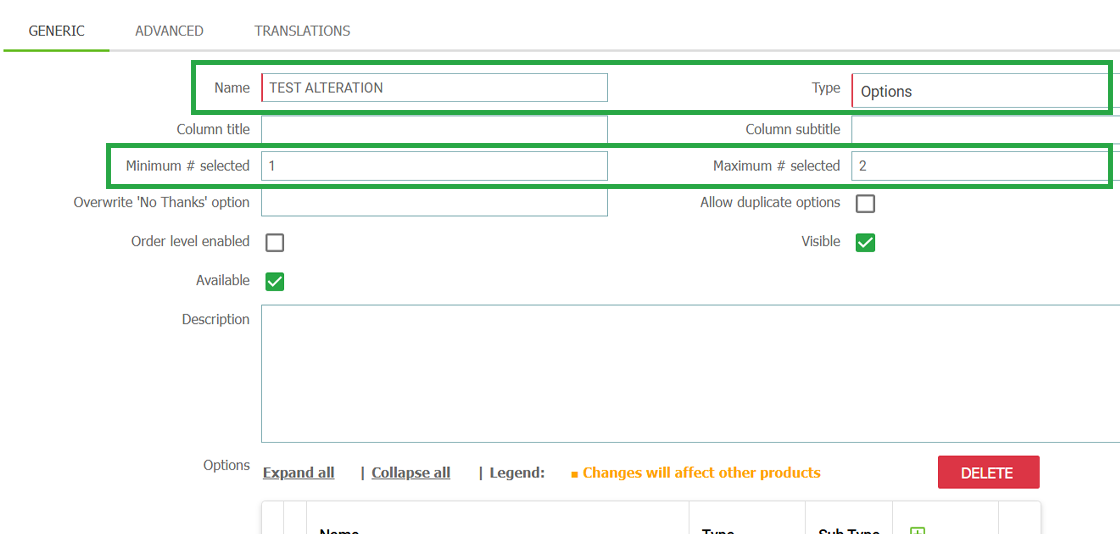
Name your alteration in the name field and change the alteration type to options from the drop-down.
Set your minimum and maximum appropriately depending on your alteration. This dictates how the guest can select their choices and how many they can / have to select.
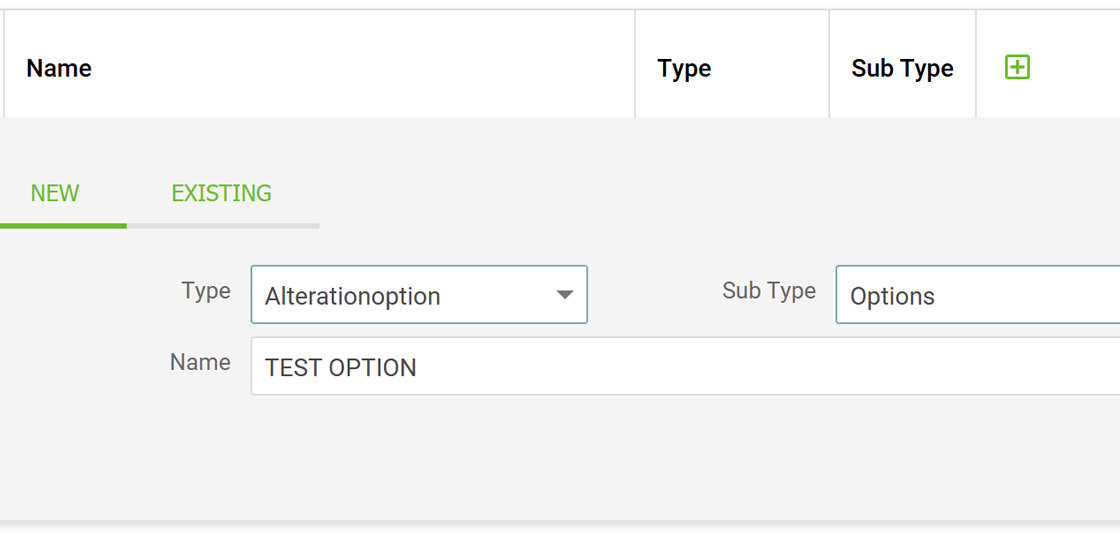
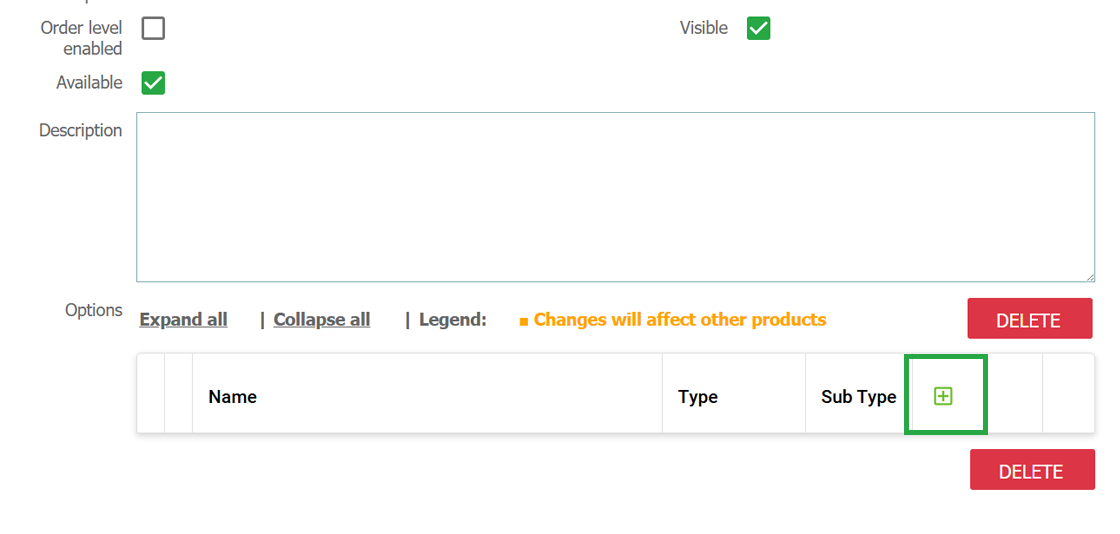
Create your first alteration option by clicking the green plus in the blue bar at the bottom of the page. Name the alteration option, set its type to alteration option and sub type to option and press save.
Continue this for all other options needed.
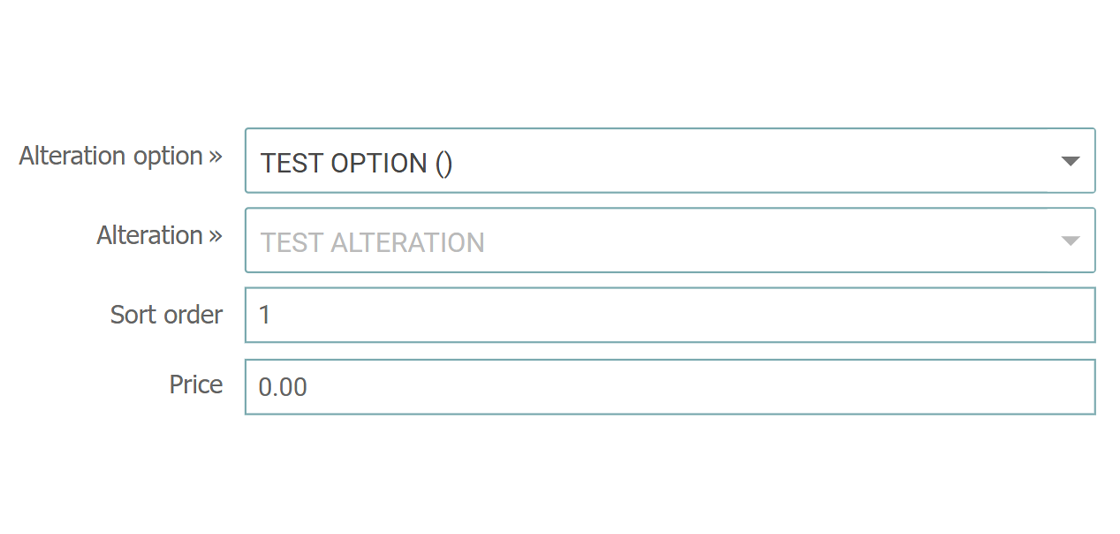
Once your alteration options are made, if any of these require individual pricing, click on the pen and paper icon to open the alteration options settings and set the price in the price field here.
Alterations can be created under each other for more specific selections.
DateTime alterations are assigned to products where you require the guest / user to select a specific date and time for the request or service in question.
This type of alteration is usually created and applied to restaurant or spa treatment products. If you are using a set up where the guest can make a reservation or book a service via the tablet, you will often want them to specify a date and time for clarity.
DateTime alterations are adjustable to your needs and allow you to set minimum and maximum dates and times away from the time the guest is using the alteration. For example, you can set your spa treatment booking alteration to be a minimum of 3 hours in advance but no more than 48 hours ahead of time.
Begin your alteration journey by locating the alterations page in the CMS by navigating to Menu Management -> Alterations. To create a new alteration click Add.
This will take you to an alteration creation page where you can select the specifics of the alteration.
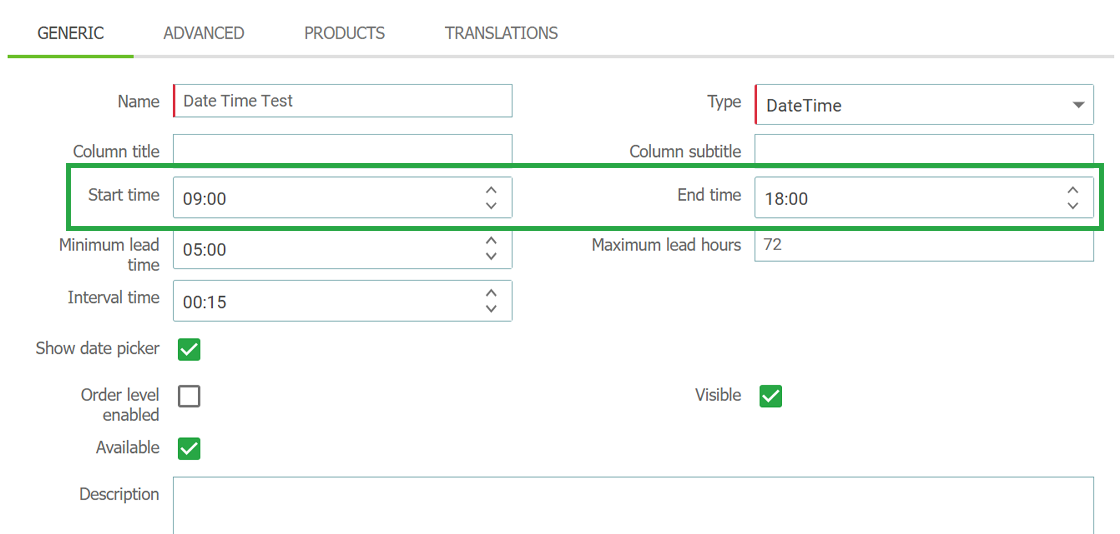
Name your alteration in the name field and change the alteration type to DateTime in the drop down. Press save and the fields beneath will update.
Set your Start Time and End Time. These will be the first available and last available time slots a guest can select.
DateTime alterations use 24 hour, military time.
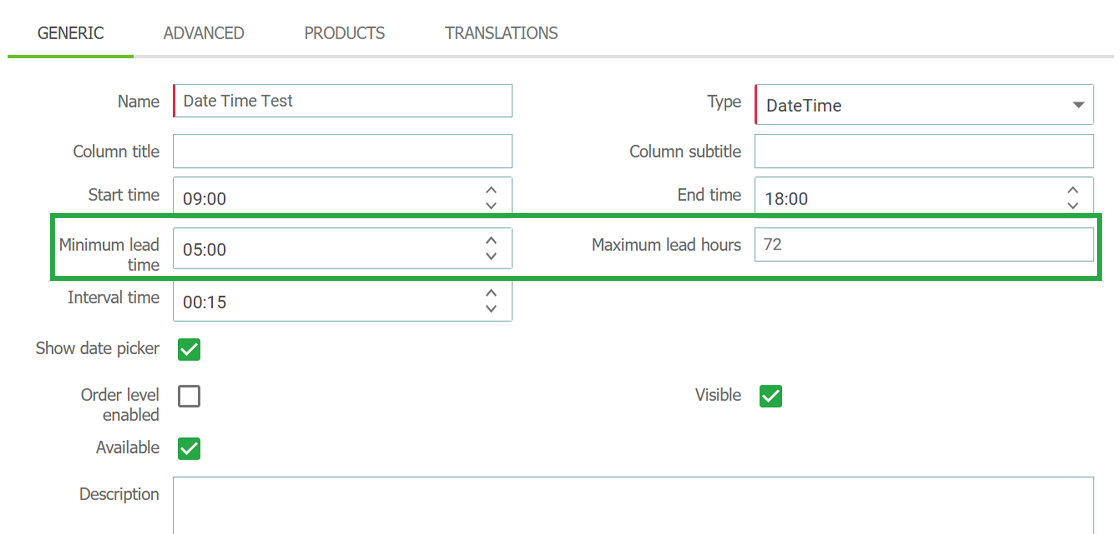
Set your Minimum Lead Time. This field controls how far in advance a guest can select a time slot.
For example, if the minimum lead time is set to 00:30 (30 minutes) then the earliest slot a guest can select must be at least 30 minutes in the future. Maximum Lead Time will be the furthest away time a guest can choose.
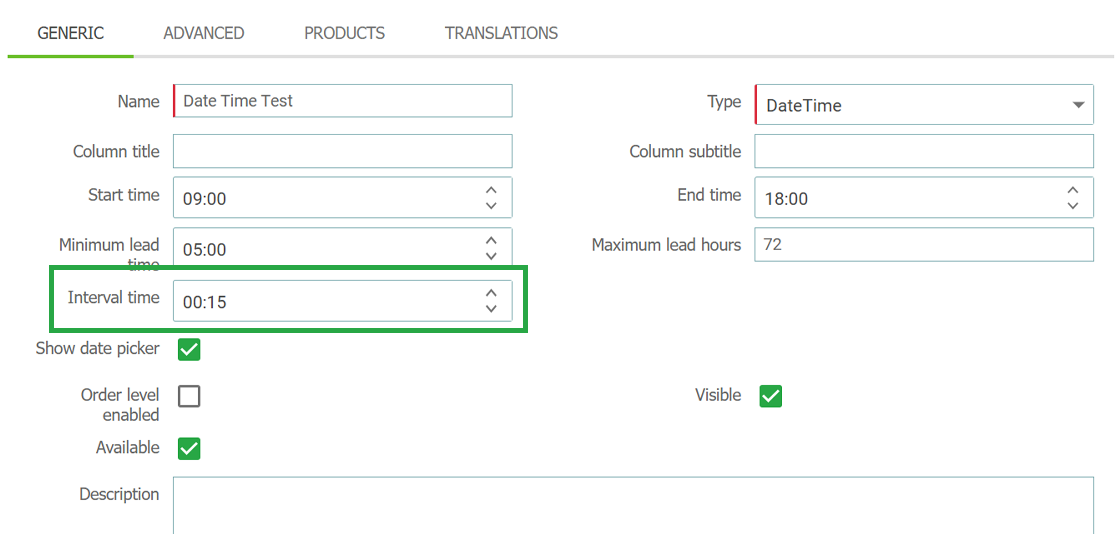
Lastly, set your Interval Time. This controls how many options will appear between your start and end time.
For example, if your interval time is 00:15 (15 minutes) than guests will be able to choose all slots between the start and end time in 15 minute intervals, i.e. 9:00, 9:15, 9:30 etc.
Form alterations are used exclusively for requesting guest details such as their name, email address, phone numbers etc.
Form alterations have 3 input field types to select, Numeric, Text & Email. Multiple of each type can be created within one form alteration and can be re-named as necessary to gather whatever information you require.
For example, you may create a form alteration for a restaurant reservation and use the numeric field to gather how many guests will be attending, and use a text field for any additional requests or notes they may want to share with you.
Begin your alteration journey by locating the alterations page in the CMS by navigating to Menu Management -> Alterations. To create a new alteration click Add.
This will take you to an alteration creation page where you can select the specifics of the alteration.
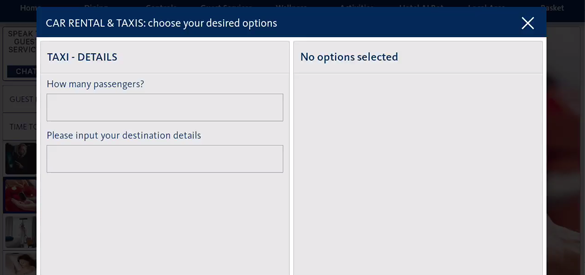
Name your alteration in the name field and change the alteration type to Form in the drop down. Press save and the fields beneath will update.
Similar to 'Options' alterations, you will need to create each question at the bottom of the page using the green plus icon.
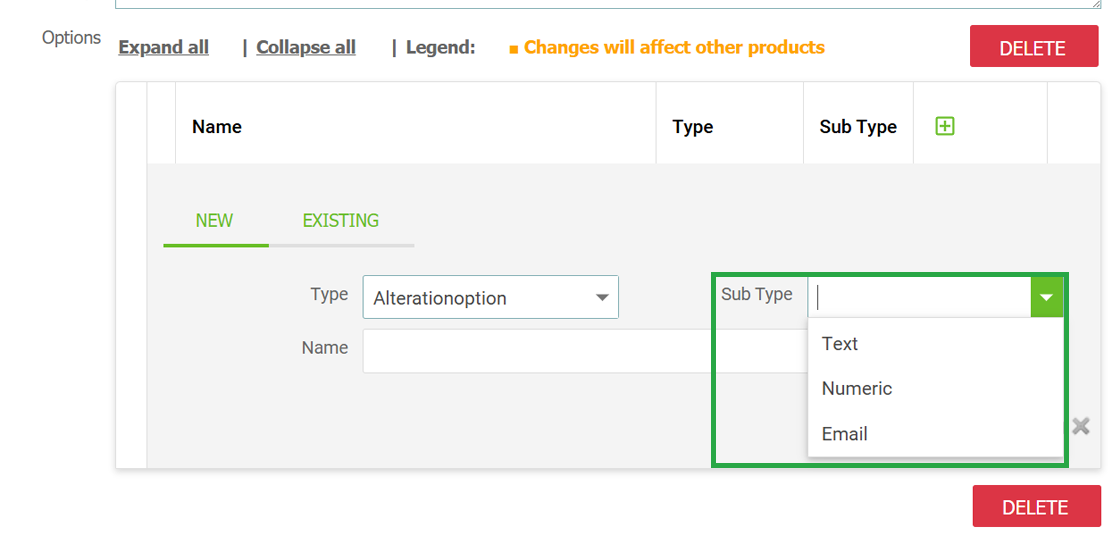
Set the 'Type' to alteration option and select either Text, Numeric or Email from the subtype field.
Enter your question within the Name field as this is what the guest will see when entering the information. Press save to enter this question into your form.
Continue adding as many questions as necessary. Once all questions have been added, press Save at the top of the page.
Locate the product or category you wish to add this alteration to and assign it accordingly. These questions will now be shown to guests when interacting with the products in question.
Once your alteration is made and saved, it will need to be assigned to a product or to a group of products depending on need.
Alterations can be assigned to individual products or categories. Any alterations assigned to a category will be applied to all products inside that category.
Locate the product or category of your choosing in the CMS Menu and open it using the pen and paper icon on the right hand side.
Press the Alterations tab and select your created alteration from the first available drop down. Products and category's can hold up to 10 alterations at a time.
Connect with our support team to discuss any content or support requirements you may have.